So, I've been quilting. I know I'm supposed to have progressed on my Moroccan Cushion, but I got distracted.

This is my Garden Party Quilt - the project that inspired me to start patchwork and quilting. It is a reminder of the happy moments shared at our "Garden Party" wedding; the appliqué blocks are some of the most special moments from our wedding, and the fabrics are all a part of our colour scheme. I have loved working on this, and watching it grow from an idea into something tangible.

I've learnt new techniques and made new friends thanks to this quilt. I've discovered that I really, really love patchwork. And florals. Unexpectedly.
And, it's turning out exactly the way I had envisioned it. That's deeply satisfying.

This is more or less what I had in mind. You have to use your imagination here, dear readers. It's a disappearing nine-patch quilt in two separate sections. The top section is 6 x 6 blocks, and the bottom is 3 x 6. In the middle are a set of windmills (pinwheel blocks). There is going to be a white border around the separate sections, and I'm going to bind it with patterned fabric.

I had initially thought that I might border each block with a simple 2.5" strip border. I think it might be too busy.

Here are my fabric choices. This is a pretty floral pattern - but perhaps too light and washed out for this colourful project?

This is a bold green border which fits in well with the colours and makes it a bit more modern than the "old fashioned" option above.

This is another option: off-white fabric with a ditsy purple floral pattern.
I can't make up my mind. I love the darker green border which I might use for the binding. While choosing fabrics, I thought that the purple was perfect and bought a generous 2 metres of it... that could make for good binding too!
I'm leaning towards leaving off the block borders altogether, doing some really pretty white quilting in the large white panels, and finishing it off with binding in the darker green. Thank goodness it is a bank holiday weekend coming up: there's going to be a lot of cutting, sewing, patching, nipping, pressing and steaming in my immediate future!
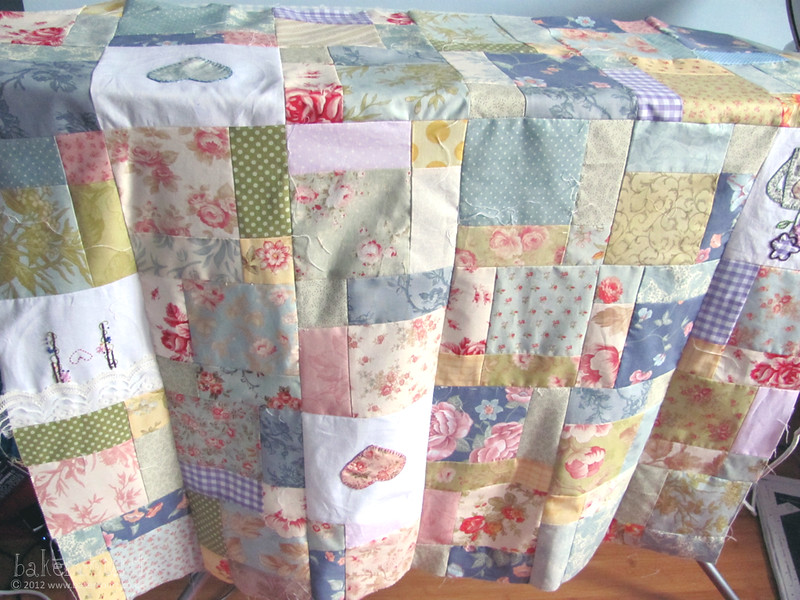
This is my Garden Party Quilt - the project that inspired me to start patchwork and quilting. It is a reminder of the happy moments shared at our "Garden Party" wedding; the appliqué blocks are some of the most special moments from our wedding, and the fabrics are all a part of our colour scheme. I have loved working on this, and watching it grow from an idea into something tangible.

I've learnt new techniques and made new friends thanks to this quilt. I've discovered that I really, really love patchwork. And florals. Unexpectedly.
And, it's turning out exactly the way I had envisioned it. That's deeply satisfying.

This is more or less what I had in mind. You have to use your imagination here, dear readers. It's a disappearing nine-patch quilt in two separate sections. The top section is 6 x 6 blocks, and the bottom is 3 x 6. In the middle are a set of windmills (pinwheel blocks). There is going to be a white border around the separate sections, and I'm going to bind it with patterned fabric.

I had initially thought that I might border each block with a simple 2.5" strip border. I think it might be too busy.

Here are my fabric choices. This is a pretty floral pattern - but perhaps too light and washed out for this colourful project?
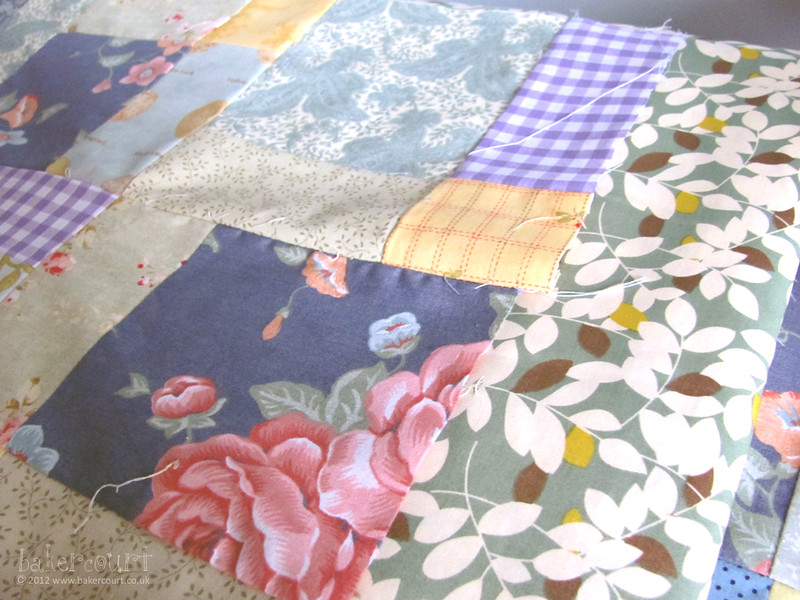
This is a bold green border which fits in well with the colours and makes it a bit more modern than the "old fashioned" option above.

This is another option: off-white fabric with a ditsy purple floral pattern.
I can't make up my mind. I love the darker green border which I might use for the binding. While choosing fabrics, I thought that the purple was perfect and bought a generous 2 metres of it... that could make for good binding too!
I'm leaning towards leaving off the block borders altogether, doing some really pretty white quilting in the large white panels, and finishing it off with binding in the darker green. Thank goodness it is a bank holiday weekend coming up: there's going to be a lot of cutting, sewing, patching, nipping, pressing and steaming in my immediate future!
We've been back for a few days now and part of me is really regretting that we didn't have a proper honeymoon break... I'm back at work and all I can think about are the sandy shores of Camps Bay beachfront, the rolling hills of the countryside, and the family and friends we've left behind. Perhaps a little getaway in January is on the cards to appease the homesickness :)


And so, here we are - a right 'handmade wedding' for your eye candy delight. I thought I'd take you on a quick tour of the handmade elements of our garden party wedding, in pictures. Here we go...
The Cake
We made the cake a few days before the wedding. I wanted something delicious, but strictly not traditional. We opted for an amazing moist chocolate cake, layered together with coffee-flavoured icing and covered in buttercream. In the shape of a teapot.
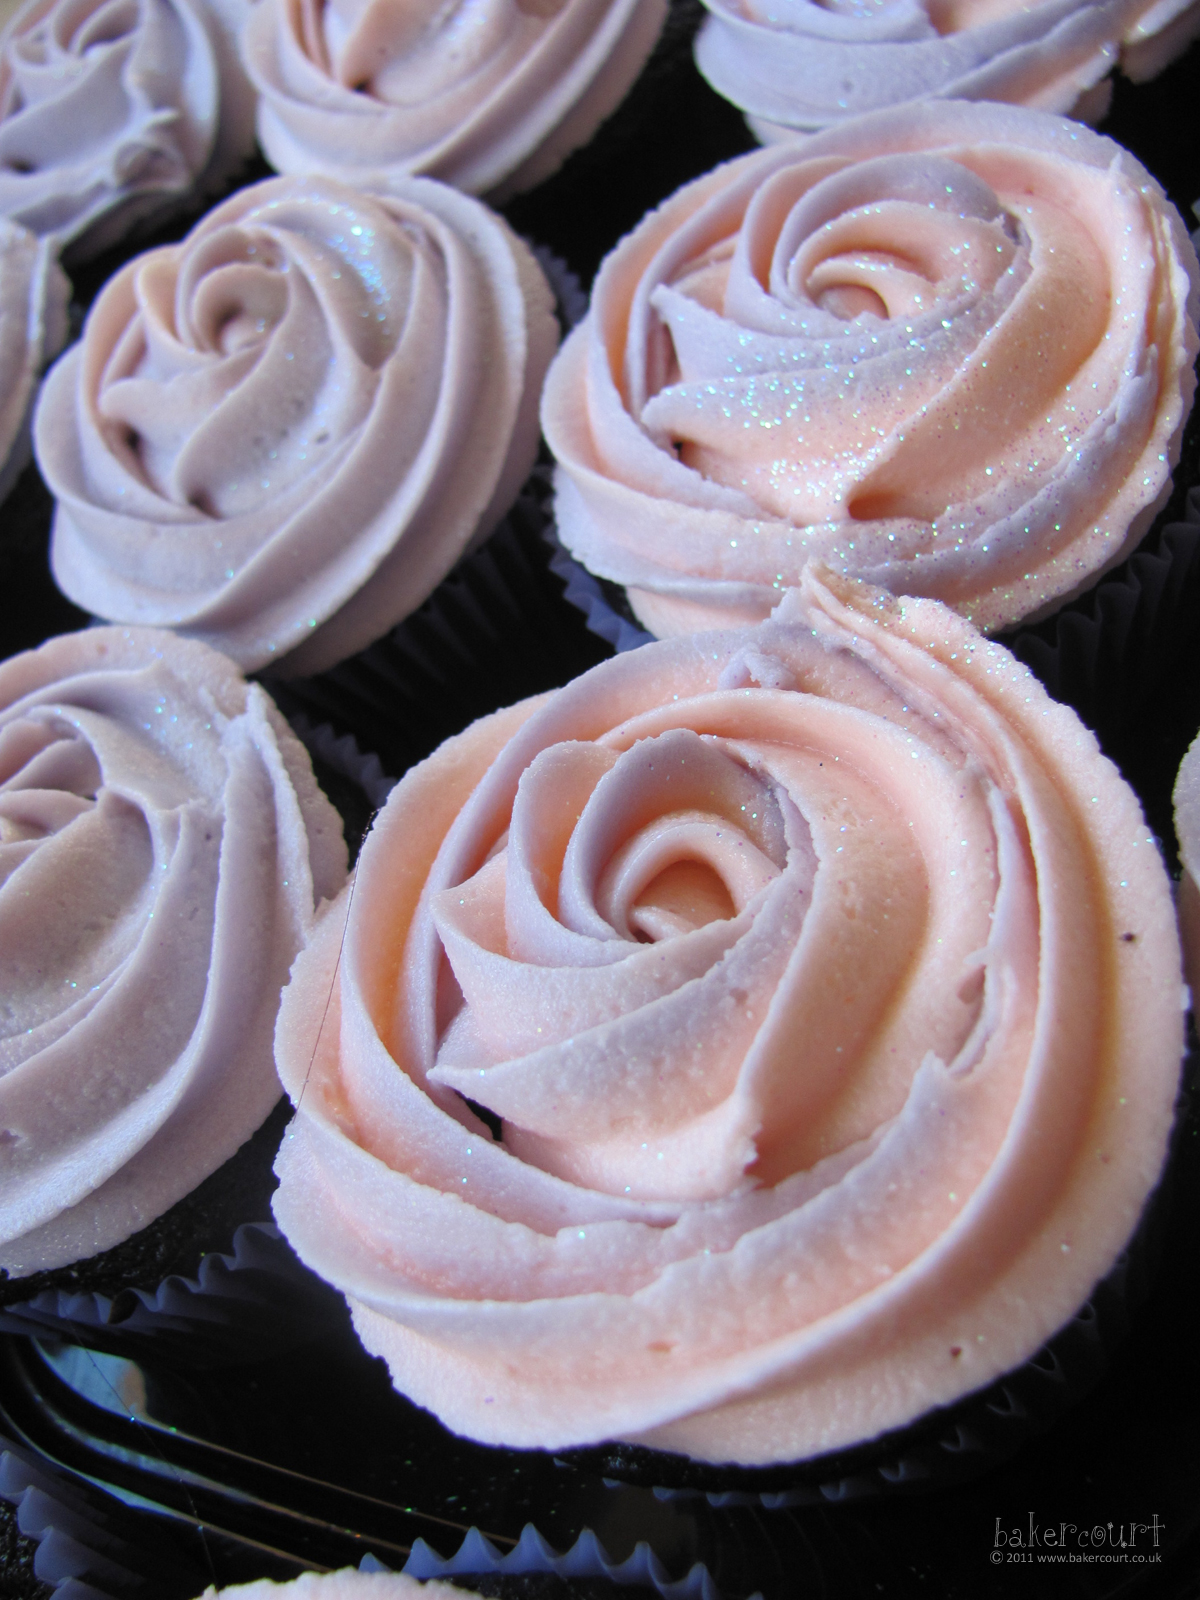
These are the cupcakes that formed the basis of our four-tier cake stand. They were a decadent chocolate, iced with buttercream (iced with a Wilton 1M tip in pink, peach and lavender coloured buttercream, sprinkled with edible glitter).

And here's the cake! A beautiful teapot cake atop three tiers of chocolate cupcakes. Yum. On either side of the cake are cake stands with heart- and teapot-shaped sugar cookies.
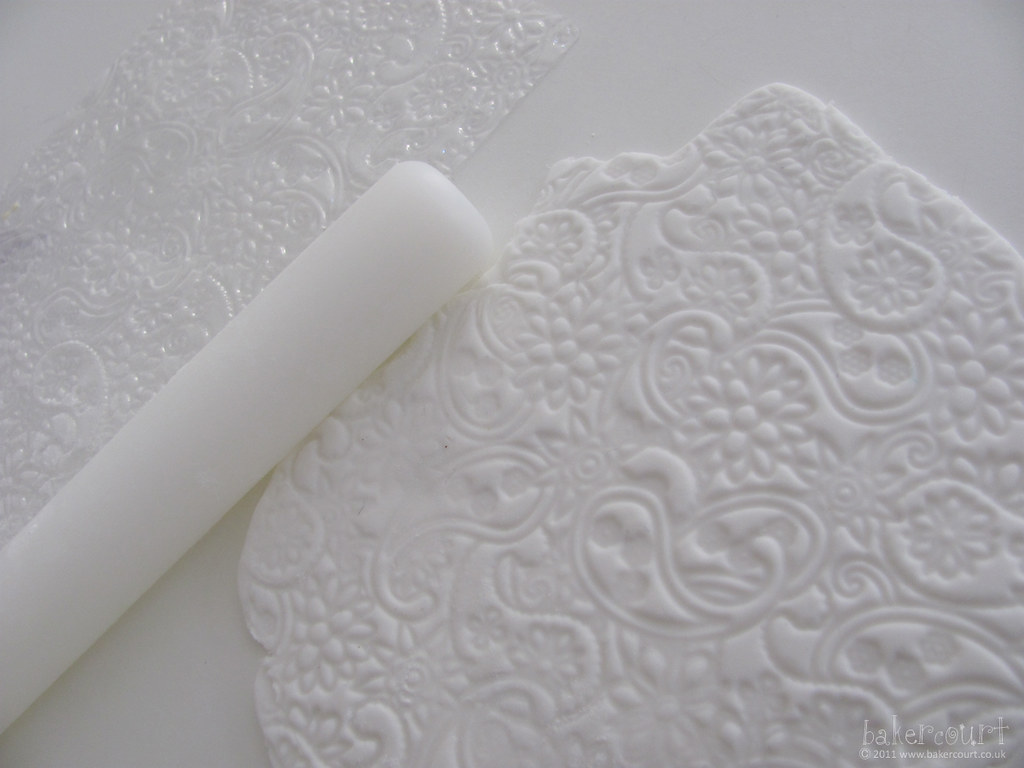
We made the top of the cake using plastic icing fondant, rolled out with an embossed paisley pattern and decorated with sugar pearls and buttercream. I made the handle and spout out of solid sugar paste which I shaped and secured with wooden kebab sticks.
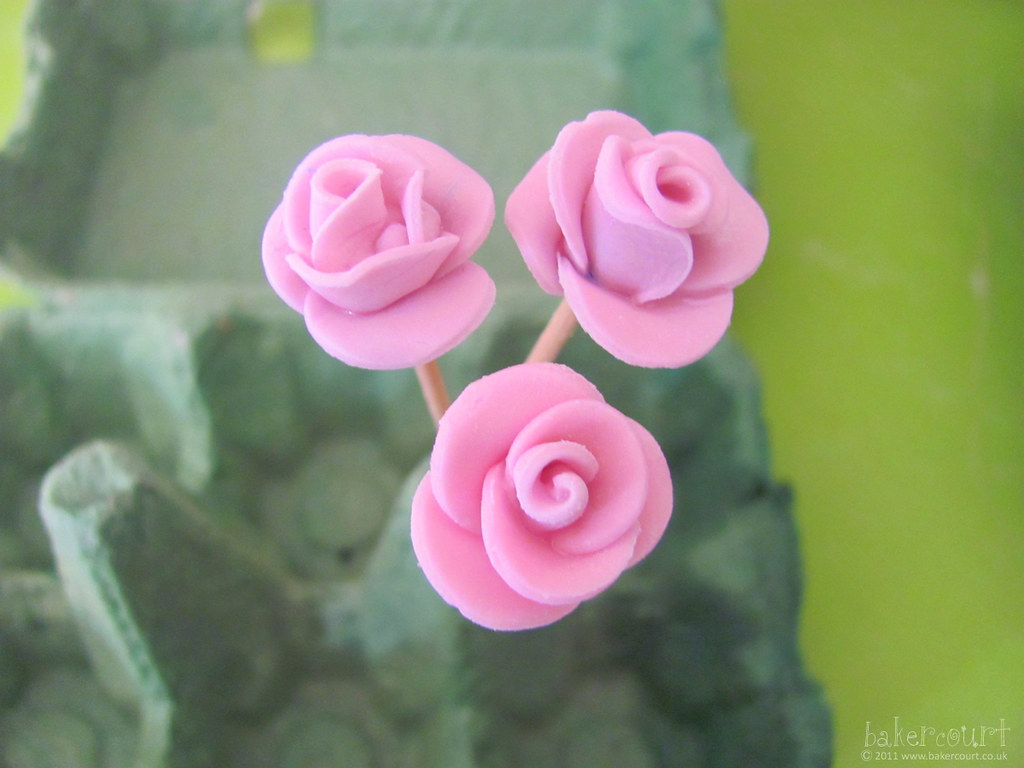
We finished the body of the teapot off with sugar roses I made using Squire's sugar paste tinted with fuchsia food colouring.

I also made sugar cookies in simple hearts and teapots, iced with royal icing and topped with buttercream flowers. They disappeared very quickly! Our cake toppers ended up on display on the cake stand rather than on top of the teapot, but they look rather nice here so I was happy with that.
The Venue
We didn't make the venue, of course, but all of our decor was handmade. Here are a few of my favourite bits:
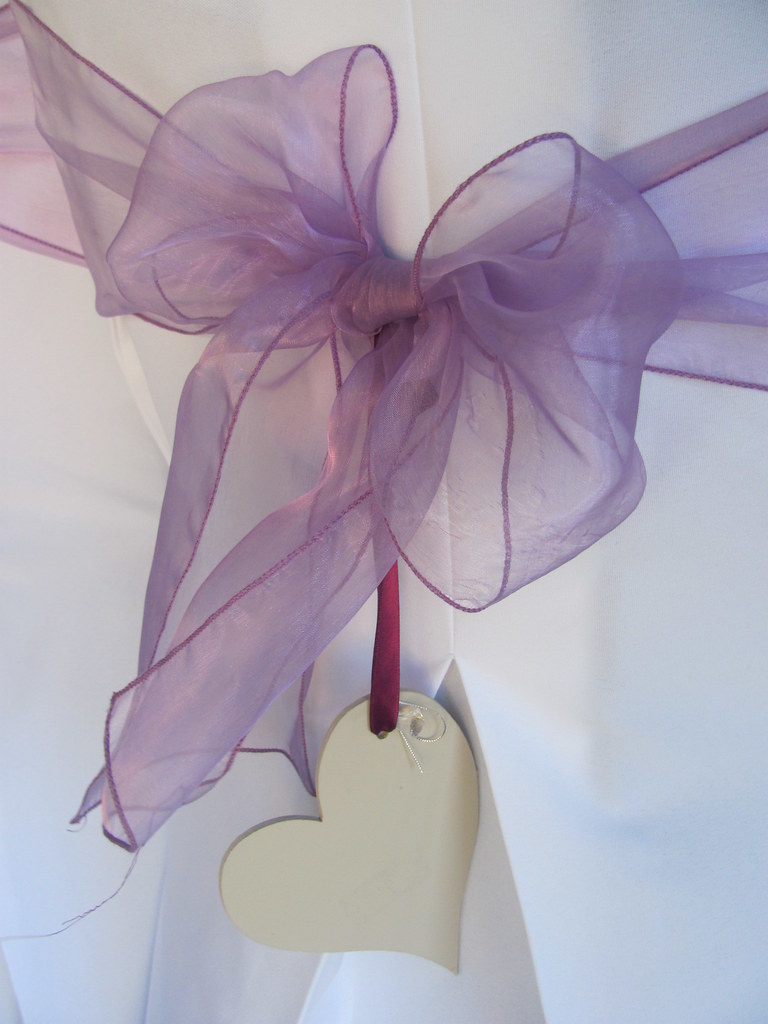
Graeme's mom made the most amazing tiebacks - handpainted, threaded, beaded, ribboned and adorned.
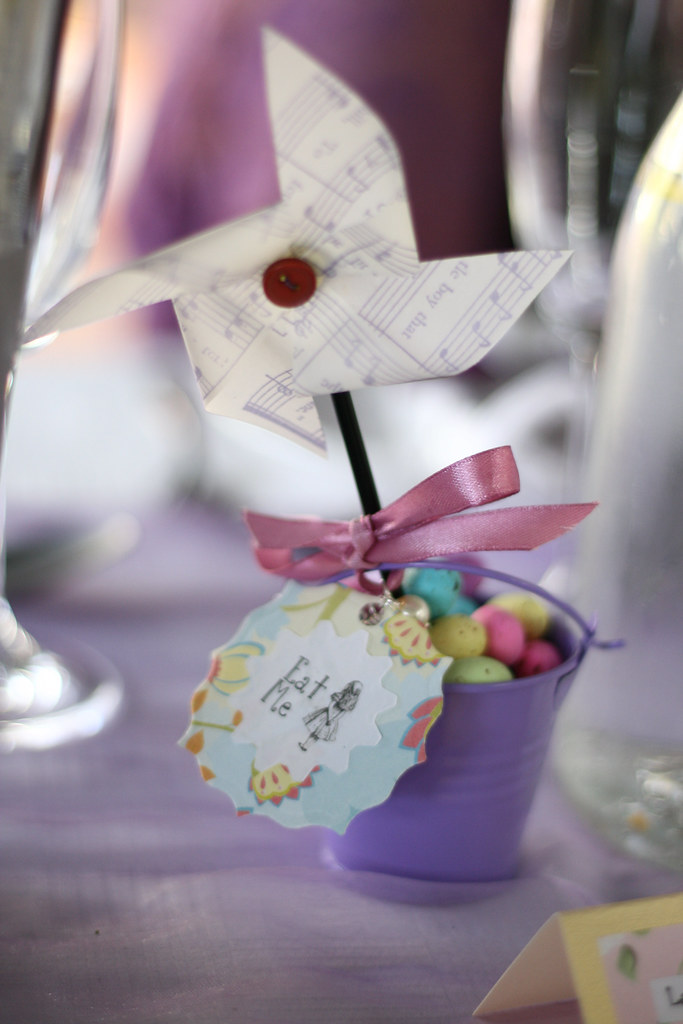
My friend Wendy made hundreds of amazing little windmills which we used to decorate the tables (buckets of sweets, there, with labels - made by us), the garden and the chuppah.
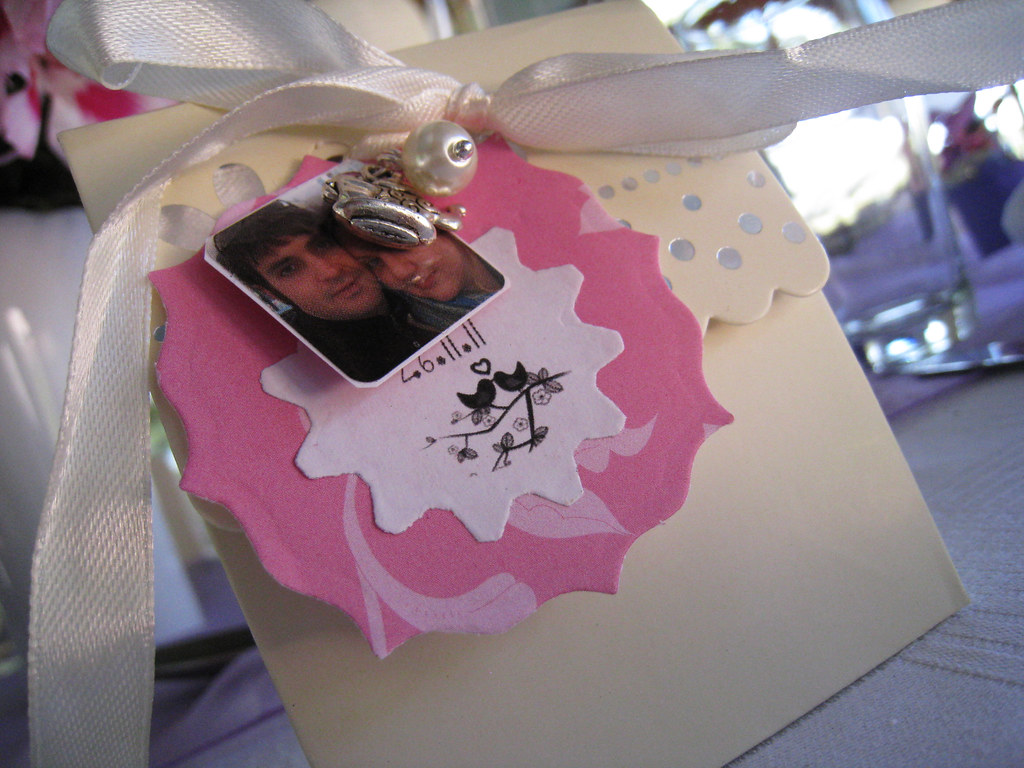
We made favour boxes. They were labelled with 'Tea for Two', the date and a pic of us. Inside we stashed two Twinings teabags (different flavours) and four Herschey's Kisses. It took us about three weeks (working on them every night) to make up all the labels, add on a beaded decal and a teapot charm, and tie these things together.

... and just to add to the 'garden party' thing even more, we hand-tied each napkin with a maroony-purple ribbon and two sprigs of lavender.
Have a look at my Flickr Album here to see more of our venue pics, including the hand-made rose-petal cones (thanks, Wendy!), the windmills around the grounds, the oh-so-pretty bunting and the place settings.
The Dress
Because what hand-made wedding would be complete without a hand-made dress? My aunt Robyn made my dress from scratch as they say, and also her own, my mother's dress, the flower girl's dress and the bridesmaids' 'over tops'.
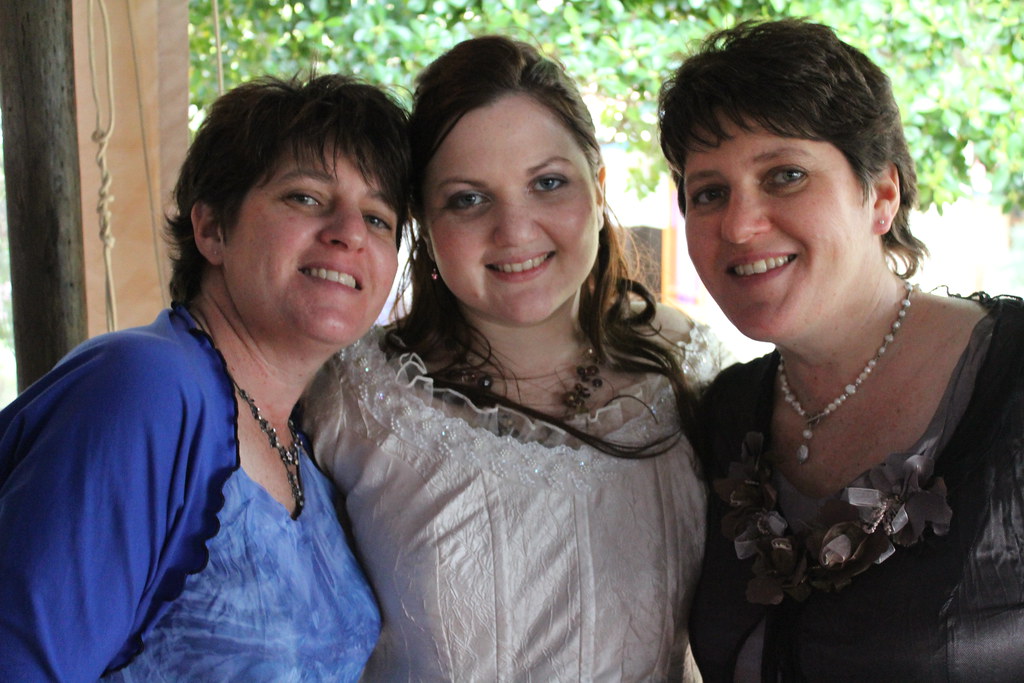
Robyn, Me, Mom.
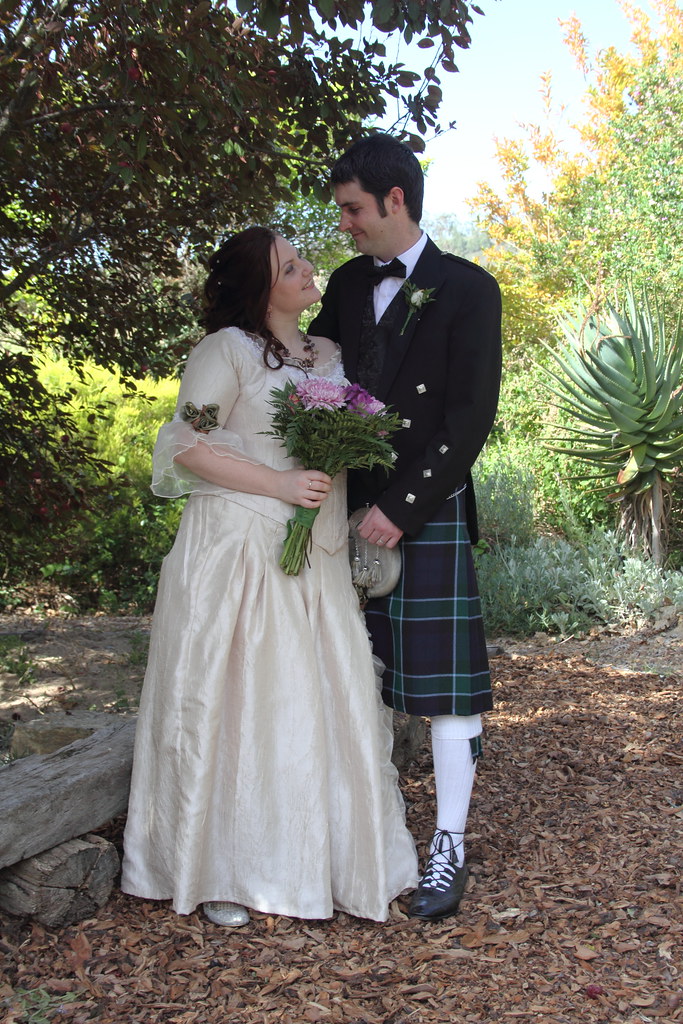
The dress! We often joke about us both wearing dresses, but mine is the one in question here :) Graeme's dress is rather lovely too. We had it made here by the Scottish Kilt Outfitters and took it over with us. After the wedding I bought him a wildebeest sporran so now he's got the whole 'South African Scotsman' thing going down quite well.
I'm still uploading pics to our Flickr Albums, they should all be up there by the end of the week. Do pop by and have a look-see if you want more weddingness!
I have so much to tell you! We've just arrived home after the most fabulous holiday in Sunny South Africa where the temperatures soared to a roasty 35'C, where the seas were sparkling in blues and turquoise, and where the food is spectacularly delicious.
And, we went for an event, of course.

Just married! We went for two long weeks and we spent the first week getting all of our wedding things together, making playlists, getting ID photos for the marriage registry, baking a cake, decorating the cake, getting the table decor organised and ready, arranging flowers, etc. Let's just say, I don't remember much of that week what with all the frantic running around, gluing, sticking, arranging and planning.

It all turned out rather well, though. We had a small family-sized garden party wedding on the lovely Fynbos Estate in Malmesbury, just outside of Cape Town. It was a windy day but the views, atmosphere and excellent guests all made up for it.

I particularly love our teapot cake with assorted rose-topped chocolate cupcakes, baked heart sugar cookies and knitted cake toppers. Giddy.

The venue had some amazing views, and everyone came together to make it a very special day. We dined, danced and enjoyed the gardens with plenty of photographs to remember it by. All of our wonderful friends took photographs so we have a lot to work through; once they're arranged, I'll post some up here and to my Flickr account so you can see more.

In the meantime, here's a quick glimpse of our wedding party showing off our beautiful shoes. Ha! Back to blogging very soon, promise. x
And, we went for an event, of course.

Just married! We went for two long weeks and we spent the first week getting all of our wedding things together, making playlists, getting ID photos for the marriage registry, baking a cake, decorating the cake, getting the table decor organised and ready, arranging flowers, etc. Let's just say, I don't remember much of that week what with all the frantic running around, gluing, sticking, arranging and planning.

It all turned out rather well, though. We had a small family-sized garden party wedding on the lovely Fynbos Estate in Malmesbury, just outside of Cape Town. It was a windy day but the views, atmosphere and excellent guests all made up for it.

I particularly love our teapot cake with assorted rose-topped chocolate cupcakes, baked heart sugar cookies and knitted cake toppers. Giddy.

The venue had some amazing views, and everyone came together to make it a very special day. We dined, danced and enjoyed the gardens with plenty of photographs to remember it by. All of our wonderful friends took photographs so we have a lot to work through; once they're arranged, I'll post some up here and to my Flickr account so you can see more.

In the meantime, here's a quick glimpse of our wedding party showing off our beautiful shoes. Ha! Back to blogging very soon, promise. x
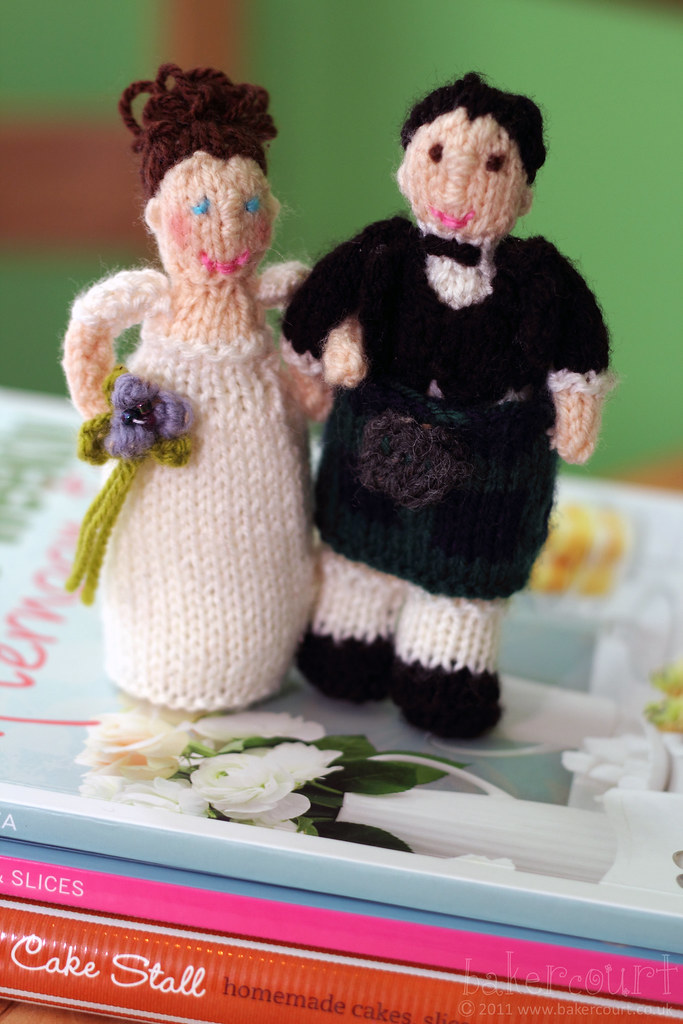
Our wedding is in three weeks, and with moments to spare, I was introduced to these beeeeyoootiful wedding cake toppers by the lovely Pennie Roberts. They're actually part of a wedding cake pattern by Alan Dart, a toy-knitting guru. I saw them. I wanted them. I ordered the yarn.
And then I told The Groom. It went something like ...
"Hi. You know you said you wanted cake toppers? Well... what do you think about knitted cake toppers?"
"Stace. Are you mad?"
My heart sunk. I had ordered the yarn already. It was too late. Turns out it wasn't as bad as I thought. In recent weeks I've been talking a lot about knitted tea cosy patterns, and in the wedding excitement, the groom thought I was trying to cover our wedding cake up with an oversized knitted tea cosy.

This is the original pattern (available on Alan's website for £2.50). As you can see, I made quite a few adjustments to make them look more like us. I gave the bride little white sleeves and a less-traditional hairstyle. I changed the flowers for a simpler variety (more akin to what we'll have on the day) and I left out the veil completely. The groom got taller and swapped trousers for kilt with matching sporran and kilt hose. His waistcoat became black, as it really is, and I gave him a high-necked dress shirt with a black bow tie.
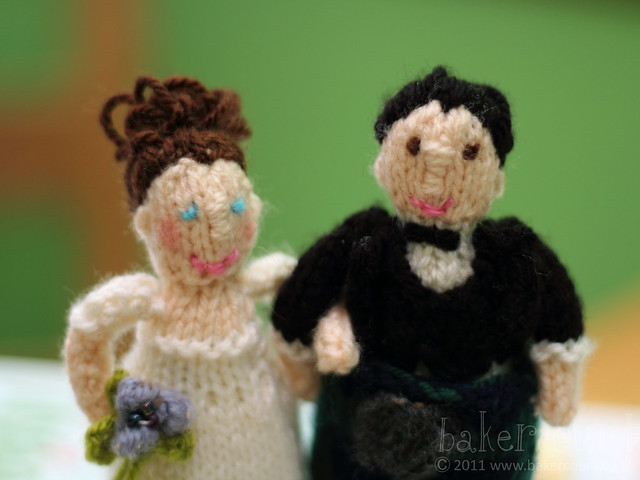
I also used chunkier coloured yarn for the faces to make them a bit more fun, although I may change this later. The only thing left to do is sew on pearl seed beads for earrings, and silver seed beads for waistcoat buttons, but I'll do this at home as I don't have any of those here.
The pattern was very easy to knit up in a day but the sewing up took a bit longer. I also had to improvise a skirt-like pattern for the groom's kilt, knit in alternate bottle green and navy blue to create a Graham of Menteith tartan replica. I'll take a better photograph of this at the wedding so you can see it!
Now, I know I said I'd bake a cake for the sugar roses and share photographs with you but I was a little distracted (forgivably, I think) by these:

Can you handle your excitement at my teapot shortbread biscuits? Maybe it's just me, but there's something so very satisfying about the pastel shades of royal icing on shortbready goodness.

I made teapots and scalloped circles, miniature heart biscuits and giant hearts. I made some cupcake-shaped biscuits as well but The Mister didn't photograph them.

I lined the hearts with white piping icing and filled with with a soft lilac icing (you can see in the image above) but they're oh-so-nice without any filling, too.

And just so you know that I didn't forget you all completely, I whipped up a batch of strawberry swirl sweetheart cupcakes and iced them with light strawberry buttercream. This one is topped with one of the miniature sugar roses I made this weekend.

You can see the strawberry swirl cake here (a bit) with the layers of vanilla and strawberry sponge showing through the white cases. I used a catering-sized piping nozzle to make nice layered buttercream swirls (yum) and topped with edible roses and glitter.

I made a selection of pink and white hearts from sugar paste as well, and sprinkled those with pearl dragees (why aren't they just called pearl balls?). I like this one best - simple, pretty and yum. As you can see, I had a bit of buttercream left over so I popped it into one of my icing squeezy bottles and popped on a star-shaped nozzle to pipe little flowers on top of the scalloped circles.

The roses turned out very well, I think, and they're quite easy to make once you get the hang of them. I love these colours, the two-toned sponge cakes, the almost-transparent edible glitter... I think we found a wedding winner! The only thing now is to figure out how to display the cookies and cupcakes at the actual wedding. Cake stand? Pretty antique plates?
Here's my rather fool-proof sugar biscuit recipe from this website:
Shortbread sugar biscuits
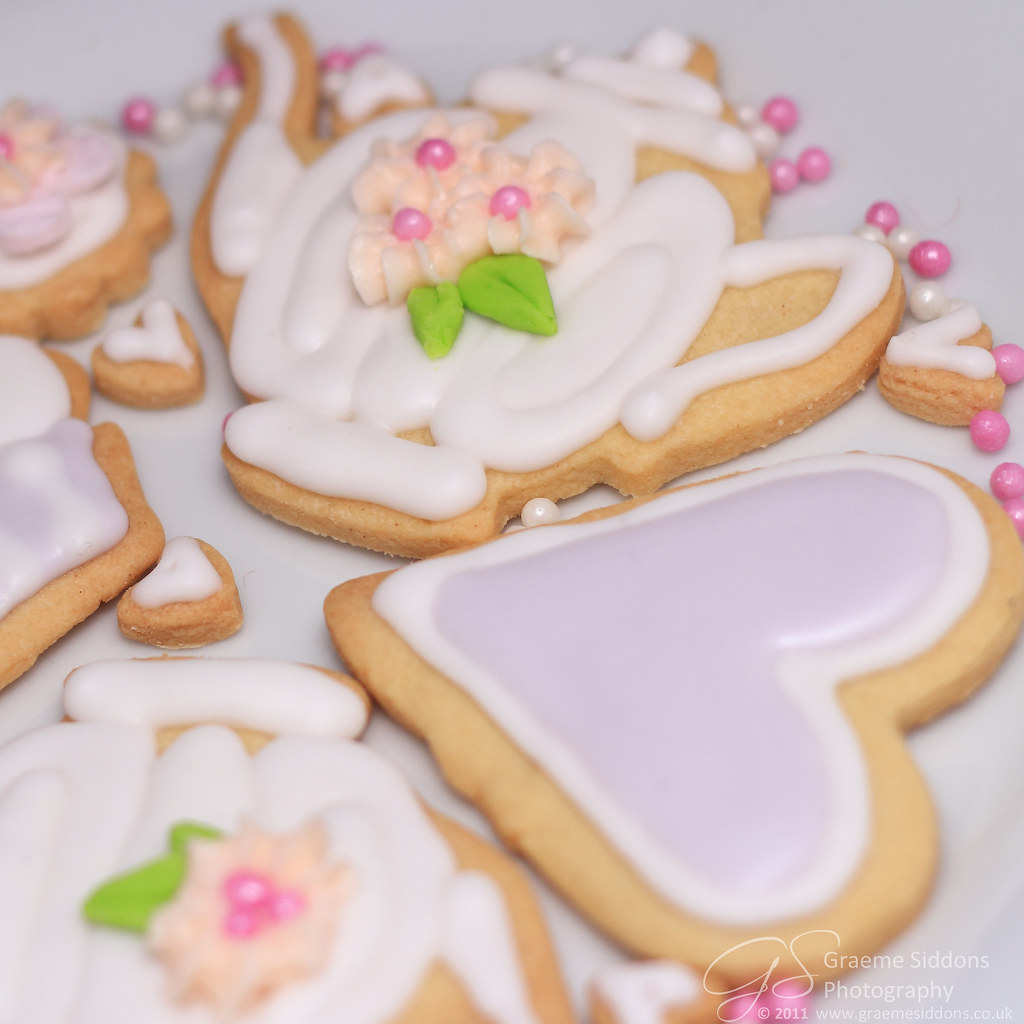
Can you handle your excitement at my teapot shortbread biscuits? Maybe it's just me, but there's something so very satisfying about the pastel shades of royal icing on shortbready goodness.
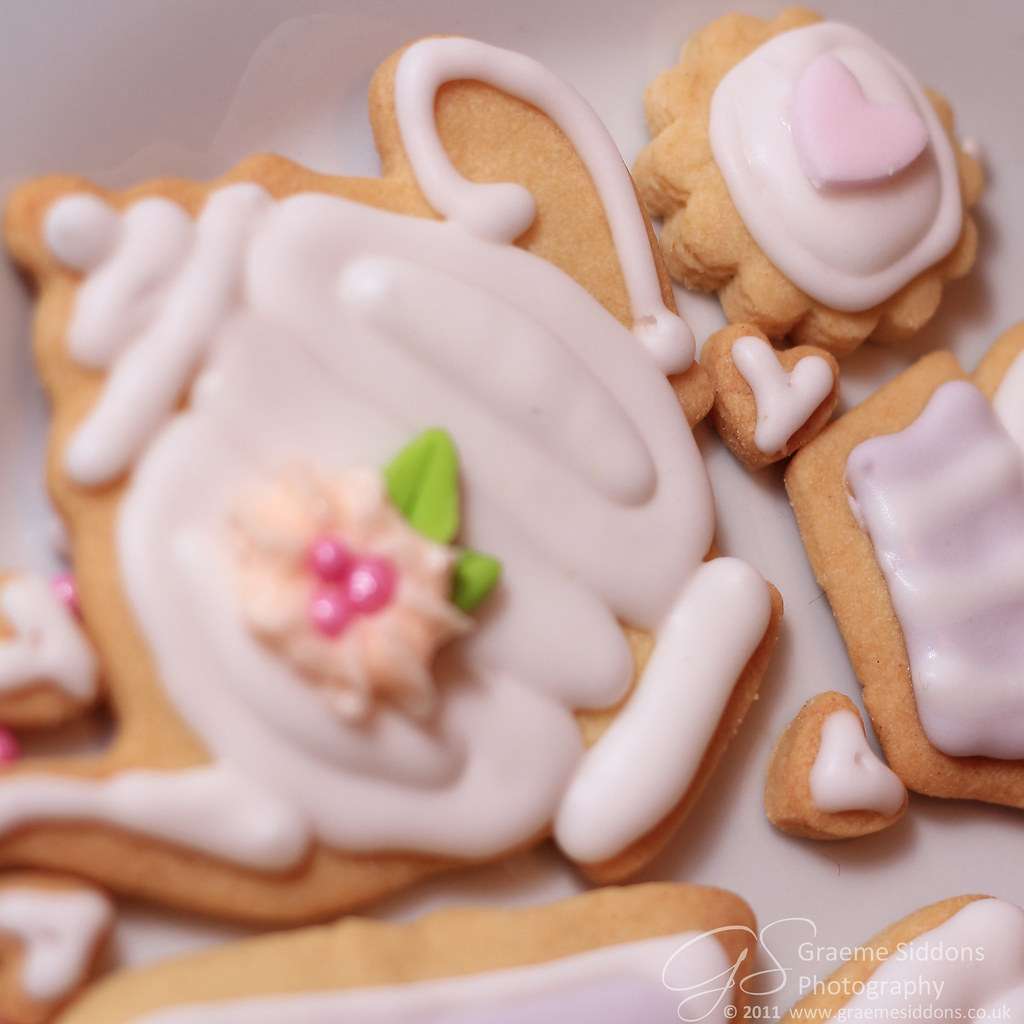
I made teapots and scalloped circles, miniature heart biscuits and giant hearts. I made some cupcake-shaped biscuits as well but The Mister didn't photograph them.
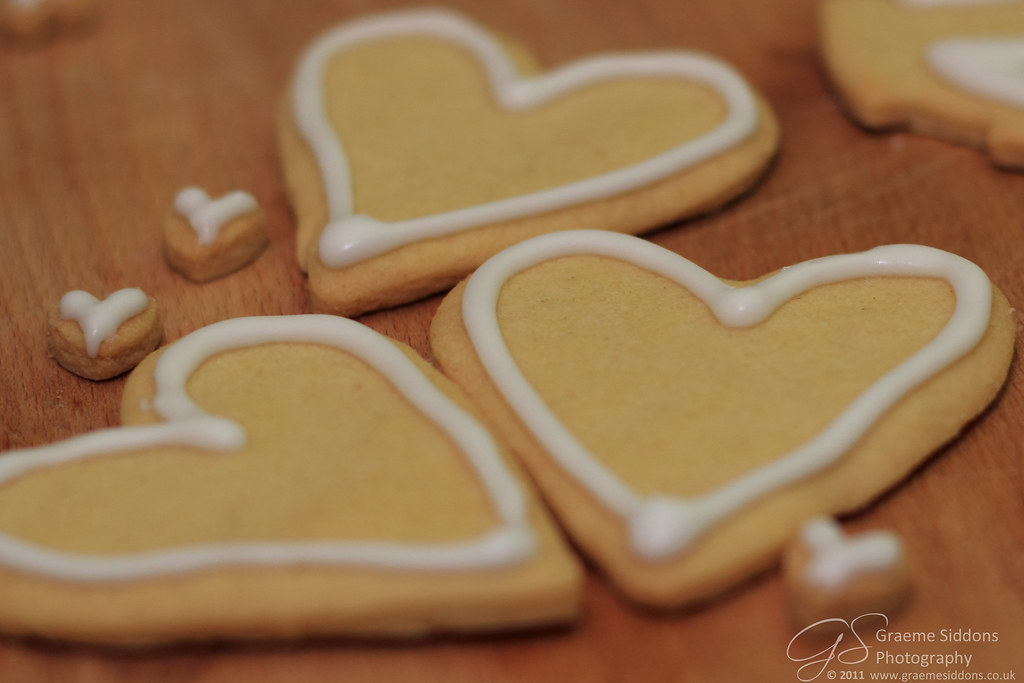
I lined the hearts with white piping icing and filled with with a soft lilac icing (you can see in the image above) but they're oh-so-nice without any filling, too.

And just so you know that I didn't forget you all completely, I whipped up a batch of strawberry swirl sweetheart cupcakes and iced them with light strawberry buttercream. This one is topped with one of the miniature sugar roses I made this weekend.

You can see the strawberry swirl cake here (a bit) with the layers of vanilla and strawberry sponge showing through the white cases. I used a catering-sized piping nozzle to make nice layered buttercream swirls (yum) and topped with edible roses and glitter.
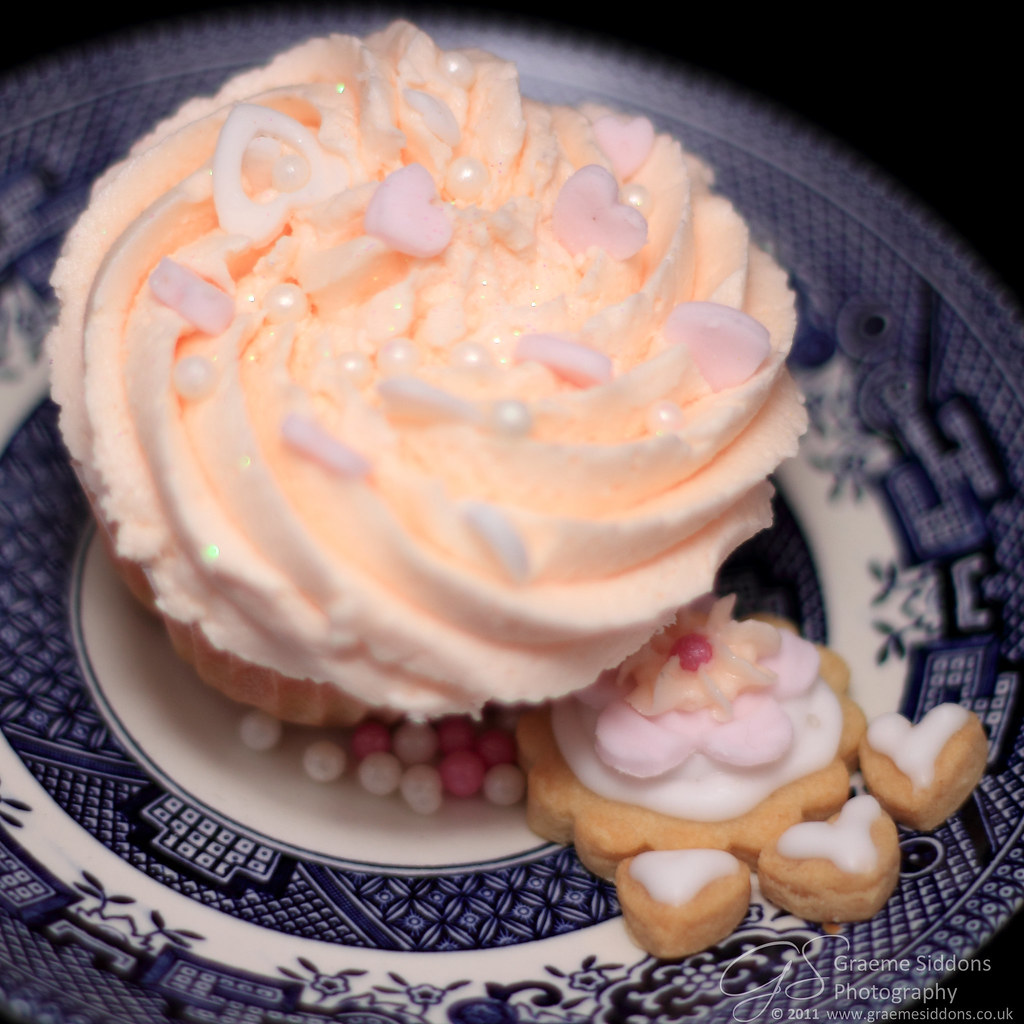
I made a selection of pink and white hearts from sugar paste as well, and sprinkled those with pearl dragees (why aren't they just called pearl balls?). I like this one best - simple, pretty and yum. As you can see, I had a bit of buttercream left over so I popped it into one of my icing squeezy bottles and popped on a star-shaped nozzle to pipe little flowers on top of the scalloped circles.
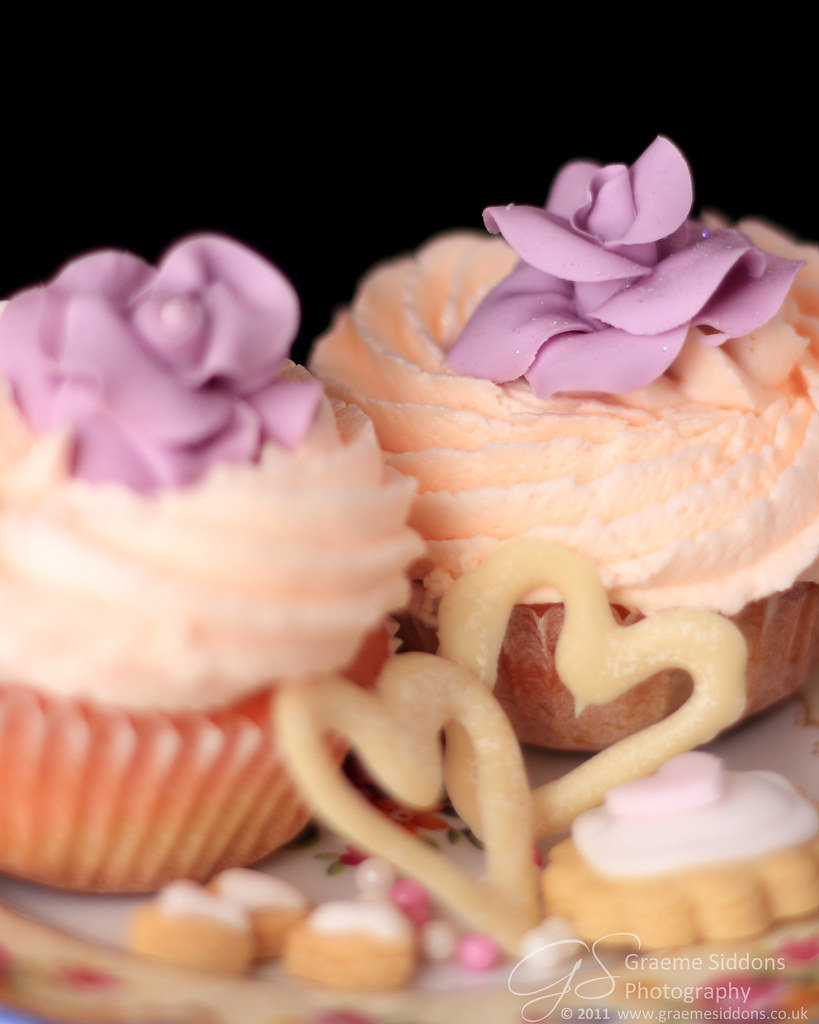
The roses turned out very well, I think, and they're quite easy to make once you get the hang of them. I love these colours, the two-toned sponge cakes, the almost-transparent edible glitter... I think we found a wedding winner! The only thing now is to figure out how to display the cookies and cupcakes at the actual wedding. Cake stand? Pretty antique plates?
Here's my rather fool-proof sugar biscuit recipe from this website:
Shortbread sugar biscuits
Preparation Time: 15 minutes
Cooking Time: 15 minutes
Makes: 40
Ingredients
250g butter, softened
1/2 cup icing sugar
1 teaspoon vanilla extract
1 egg, at room temperature
2 1/2 cups plain flour
1/2 cup cornflour
Method
1. Using an electric hand mixer, beat butter, sugar and vanilla
until pale and creamy. Add egg. Beat until well combined.
2. Sift flour and cornflour over butter mixture. Mix well.
Divide in half. Press each half into a disc. Wrap each disc in baking paper.
Refrigerate for 20 minutes.
3. Preheat oven to 160°C. Line 2 baking trays with baking
paper. Roll each disc out between 2 sheets of baking paper to 3mm-thick.
4. Cut biscuit shapes out of the dough. Place onto trays. Roll leftover dough together and repeat. Refrigerate
biscuits until firm. Bake for 15 minutes or until light golden. Stand on trays
for 5 minutes. Transfer to a wire rack to cool.
Notes
You can dip the cutters in flour in between shapes to prevent the dough from sticking to the shapes. This dough also freezes (and defrosts!) well.
Right this very moment I've sent off an email to request a wedding venue booking for the 26th of November 2010. *breathe*
Here are some ideas, after spending the morning on Google.


This button bouquet is from Etsy Seller Jillianns.
Here are some ideas, after spending the morning on Google.


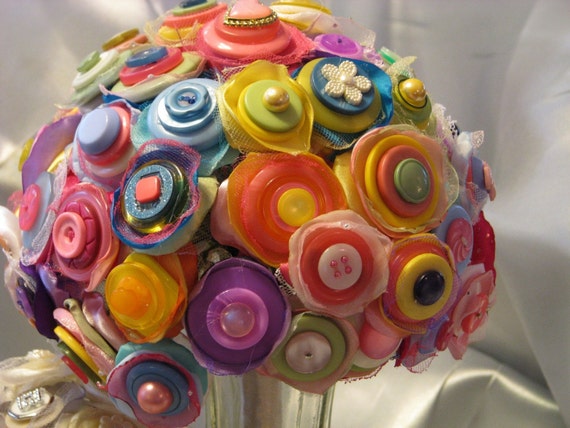
This button bouquet is from Etsy Seller Jillianns.
We might have stumbled upon the perfect wedding venue.
Of course, to actually have the perfect wedding venue, we have to readjust our budget, realign our entire idea of the perfect wedding, and just throw all traditional wedding phooey out the window.
Ho-hum.
It's called Fynbos Estate, and it's in Malmesbury. But if you love us, if you reaaaaally love us, you'll drive that far.
Here is some eye-candy for you:

It's a beautiful wine farm estate at the end of a windy, dusty road.

... nestled underneath a mountain.

The view is rather pretty: there's a blue swimming pool, some pretty green mountains over yonder, and the whole thing is in a valley, so the grape vines and mountains and greenery unfolds from underneath this hidden retreat. In the picture above, the luncheon will take place inside the tent-y thing; the sides will be rolled up.

Next to the tent is the main house - we can use this for getting ready, setting up, or whatever else we feel like using it for. We're going to have a lunch-time wedding; if you have an evening wedding, you have the option to stay over for the night at an additional accommodation charge per person.

There's a lovely garden in front of the house, and this little nook (above) is where the actual ceremony takes place (if you don't prefer to have it in the chapel, which we don't). Apparently they are able to fit 100 people in there.

You will have to use your imaginative powers here and visualise white-covered banqueting tables, fully raised tent sides, pillars wrapped in flowers, fairy lights and white linen, etc.

This is the slightly raised area directly to the right of where I took the previous photograph (imagine me swivelling in place to capture this). This is where the wedding party is, and the buffet. I like that: we'll eat first, presumably. The only downside is that this is also where the toilet is. Perhaps we will rearrange it all.
You can see here for more ideas on how they do the venue 'up' for weddings and whatnots.
... and so?
Ah, and before I forget, it looks like we might be having a Tea Party Wedding after all. Huzzah!
Of course, to actually have the perfect wedding venue, we have to readjust our budget, realign our entire idea of the perfect wedding, and just throw all traditional wedding phooey out the window.
Ho-hum.
It's called Fynbos Estate, and it's in Malmesbury. But if you love us, if you reaaaaally love us, you'll drive that far.
Here is some eye-candy for you:

It's a beautiful wine farm estate at the end of a windy, dusty road.

... nestled underneath a mountain.

The view is rather pretty: there's a blue swimming pool, some pretty green mountains over yonder, and the whole thing is in a valley, so the grape vines and mountains and greenery unfolds from underneath this hidden retreat. In the picture above, the luncheon will take place inside the tent-y thing; the sides will be rolled up.

Next to the tent is the main house - we can use this for getting ready, setting up, or whatever else we feel like using it for. We're going to have a lunch-time wedding; if you have an evening wedding, you have the option to stay over for the night at an additional accommodation charge per person.

There's a lovely garden in front of the house, and this little nook (above) is where the actual ceremony takes place (if you don't prefer to have it in the chapel, which we don't). Apparently they are able to fit 100 people in there.

You will have to use your imaginative powers here and visualise white-covered banqueting tables, fully raised tent sides, pillars wrapped in flowers, fairy lights and white linen, etc.

This is the slightly raised area directly to the right of where I took the previous photograph (imagine me swivelling in place to capture this). This is where the wedding party is, and the buffet. I like that: we'll eat first, presumably. The only downside is that this is also where the toilet is. Perhaps we will rearrange it all.
You can see here for more ideas on how they do the venue 'up' for weddings and whatnots.
... and so?
Ah, and before I forget, it looks like we might be having a Tea Party Wedding after all. Huzzah!