How to make a sugar rose
Saturday, October 08, 2011So - it's official. The wedding countdown has begun. There are only 49 days until we get married.
Eek!
I've decided to make my own cake. It's just one of those things that I want to do, and that I can do, so why not? I originally wanted a cake from the gurus at Choccywoccydoodah (a sort of tea party cake, with a teapot at the top, and various roses, butterflies and teacups cascading down the tiers).

Ah! I found a picture. Isn't it beautiful? I have some reservations about this design though: I don't like the banner that flows down the cake, although I'm sure the original recipient requested this. I also don't want to overdo the sugar paste so I may change the whole cake and leave the teapot and cakes off - as much as I love them.
I really like the idea of a three-tiered cake iced in buttercream and decorated with roses (and possibly patterned white chocolate too) so I've set aside the next few weekends to perfect my cake-decorating skills.
This weekend was dedicated to learning how to make sugarpaste roses (or, sugar roses, as they're called here), so, seeing as I've done the legwork already, I thought I'd share the steps with you.

I used Squire's Kitchen flower sugar paste in soft lilac and a set of Windsor rose petal cutters. Apologies in advance for the photos - my camera doesn't like taking pics at night!
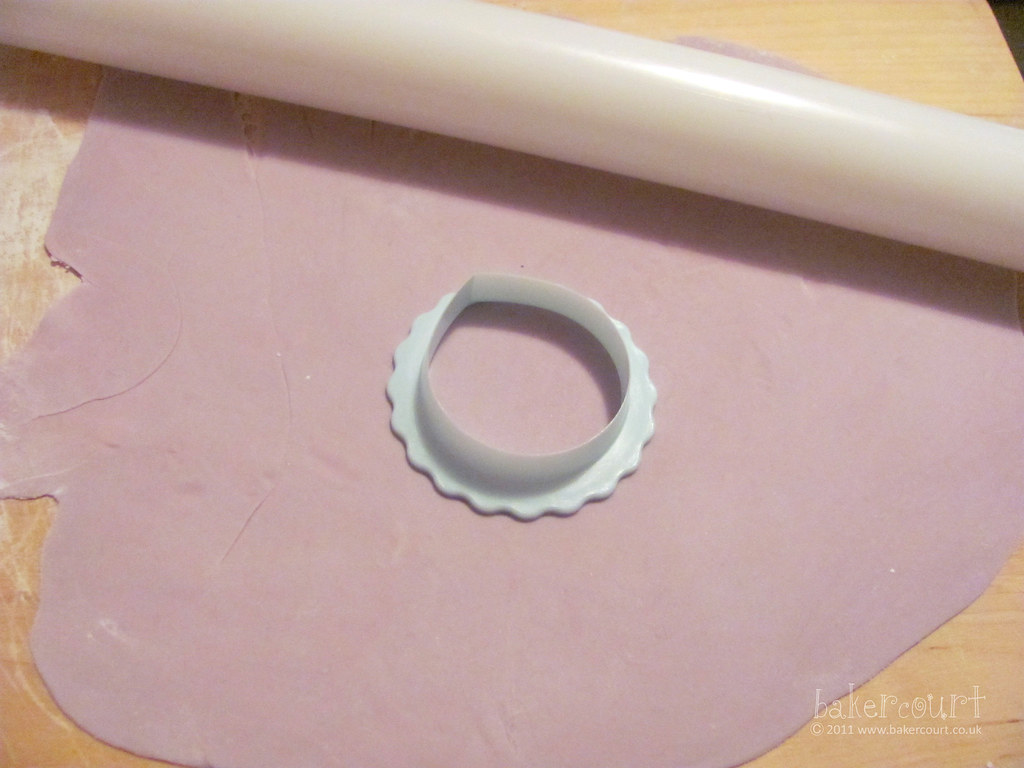
You have to roll out your sugar paste really, really thin. I went for around 1mm thickness. A sugar paste roller is very useful when you're trying to get your paste this thin: it is smaller than a regular rolling pin and is very easily manoeuvred to get to those teeny weeny bits at the ends. When it is thick enough, cut out your rose petals in your preferred size. I wanted to make a large rose so I cut out 12 petals. You should put these aside in an airtight container so they don't dry out.
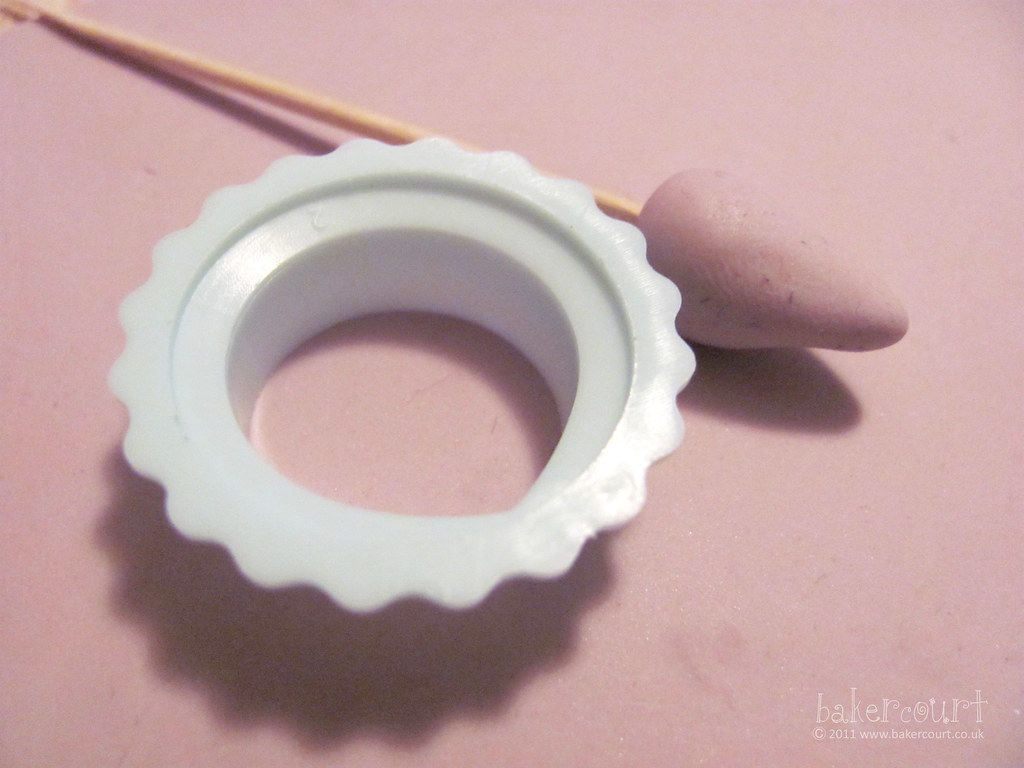
You then need to roll out a little cone (it's the base of the rose) from the leftover bits. I found that inserting a tooth pick (or cocktail stick) gives you more control, and you can use it later to stand the roses up to dry. The cone shouldn't be too big - just big enough for one petal to wrap around (mostly).
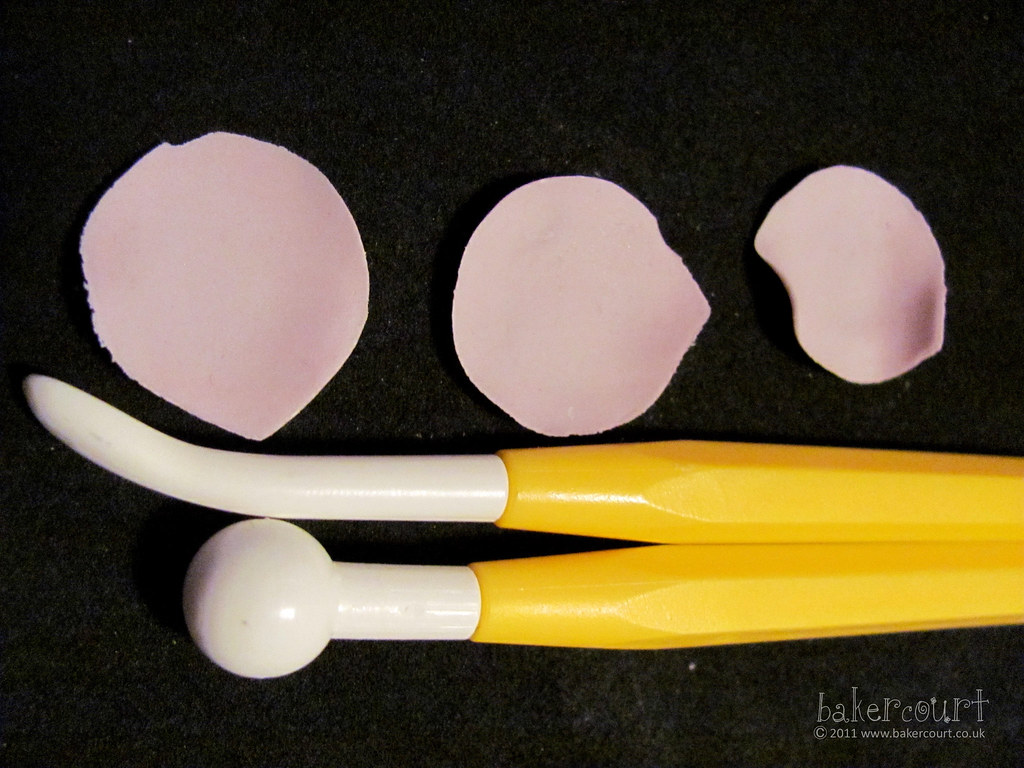
The next step is to smooth out your petals, making them thinner at the edges and more realistic. You should do this in stages, doing as many petals as you need. You only need to start out with one. I used a foam pad for the base, but you can use a sponge or a sugar paste mat. I use the ball tool to rub the inside of the petal, giving it depth and shape. Then, use the bone tool to smooth out the edges and make them thinner.

Here's an idea of the various stages of thinning. You start with your cut out, dome the middle but, then start thinning until the edges frill.
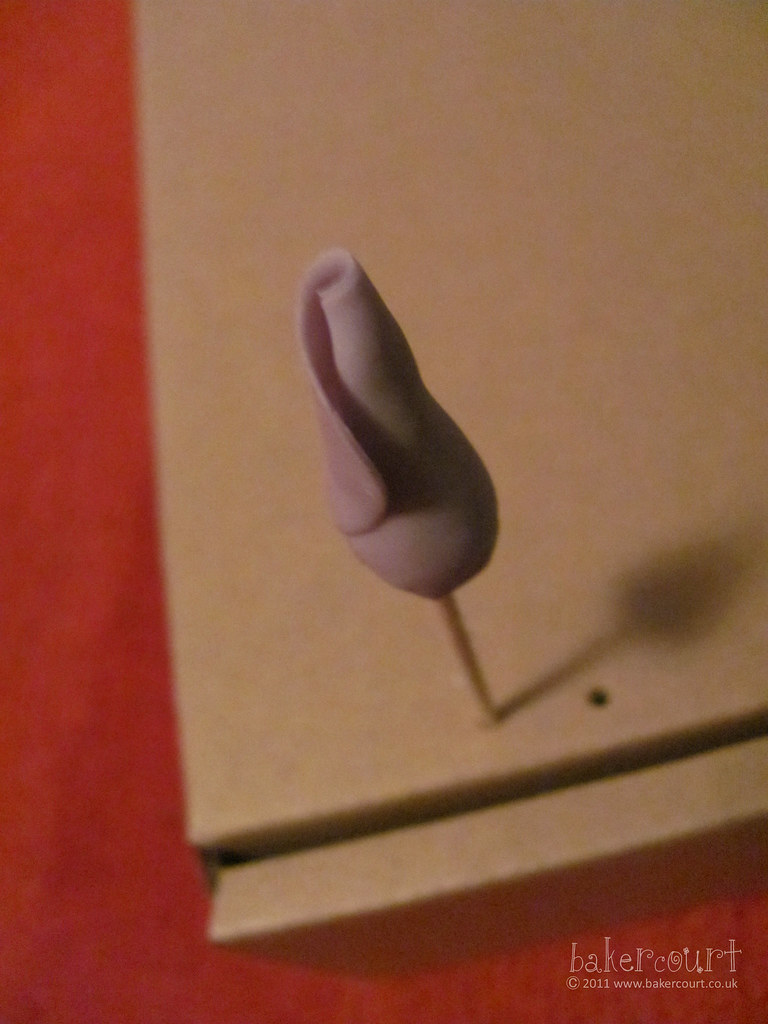
You now need to wrap a single petal around the cone to create the inner bulb. Before you wrap, you should apply a tiny spot of edible glue to the bottom of the petal (the pointy bit). You're going to cover up the bulb around the bottom, so focus on getting the top nice and neat. The idea is to make the tip roll around and wrap back to give it a bit of a 'swirl' - just like inside a real rose.
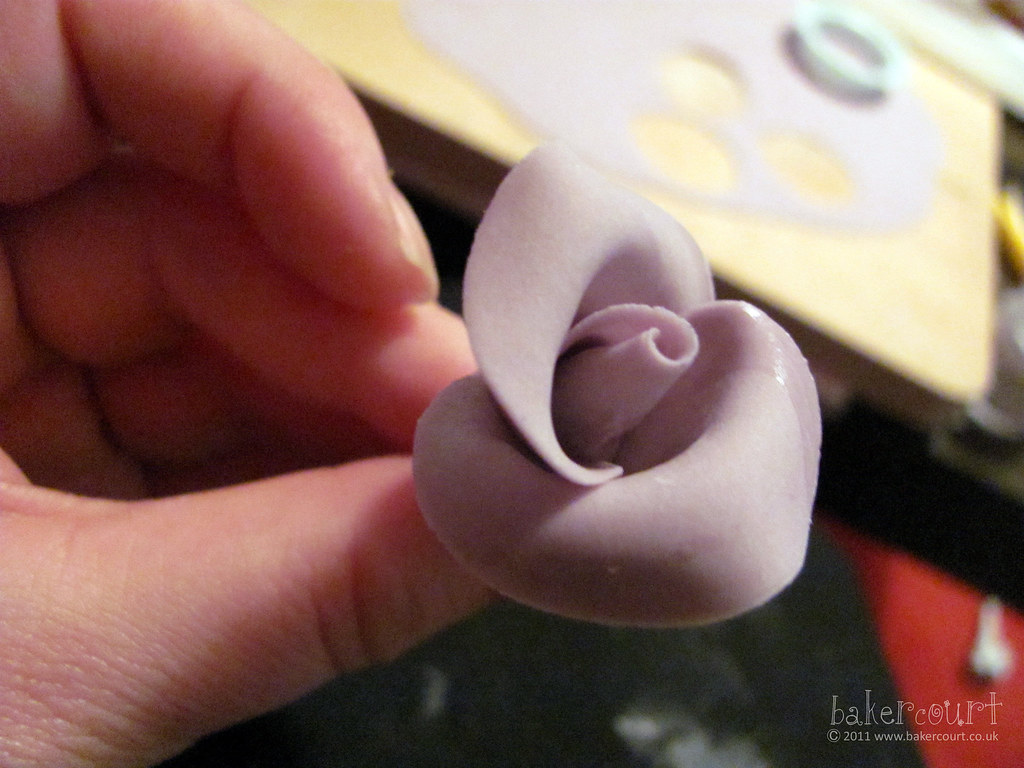
For the second layer you'll add two more petals. I glue the bottom, and slightly up each side (you can see the glossy bit in the picture above - this will dry later!). The petals should wrap around with one end inside the next petal. That means that you'll have to stick down the start of the second petal before firmly pushing the end of the first petal down on top of it.
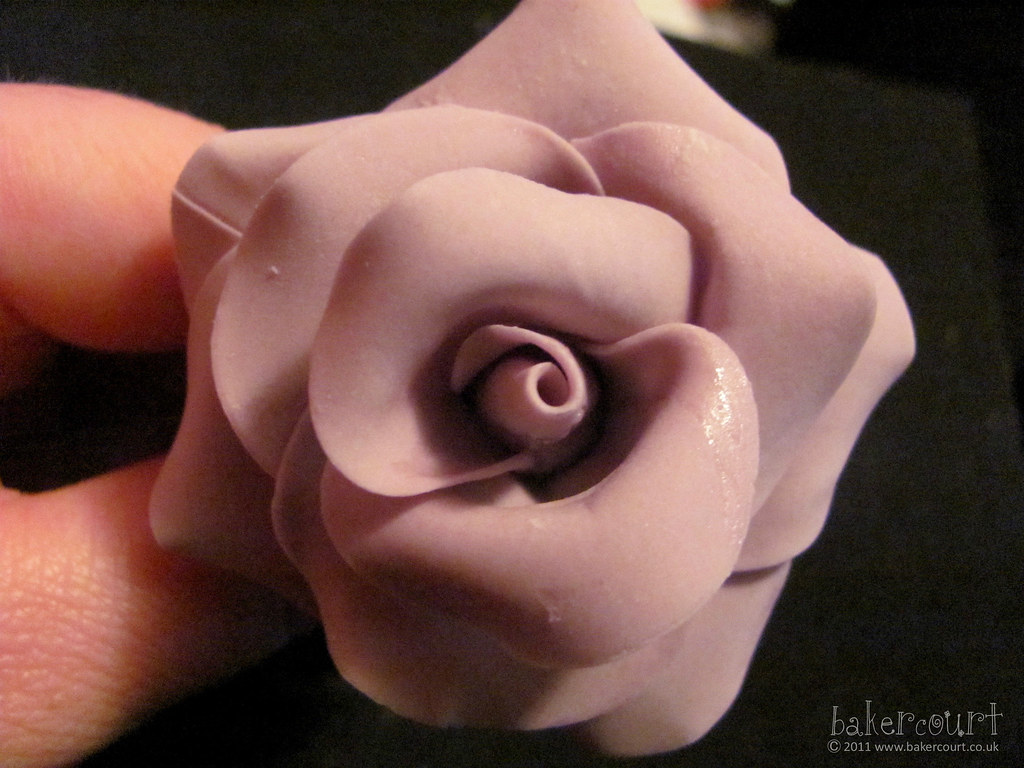
Here you can see I added a second layer of three petals, and a fourth layer of five. From the third layer onwards you should increase in odd numbers to give the rose more depth.
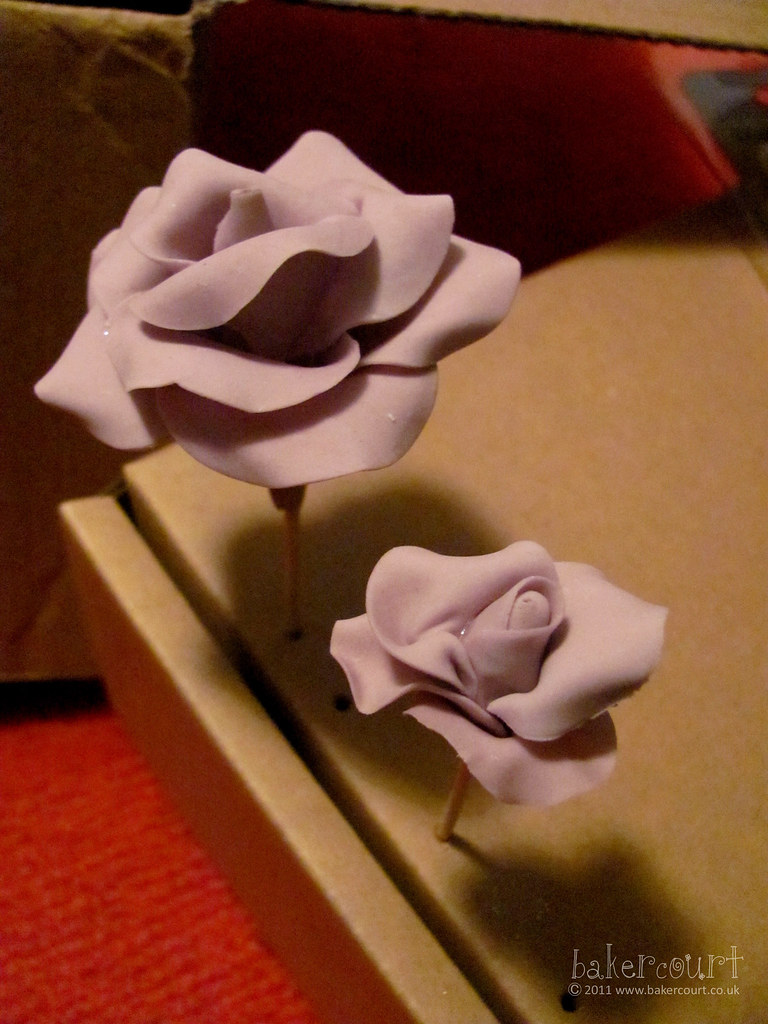
I experimented with different sizes and thicknesses and found that the thinner petals tend to bend and frill of their own accord (like the smaller rose above), whilst the thicker petals needed a bit of coaxing into shape by rolling the petals under themselves with a toothpick.
The Squires Kitchen flower paste is an absolute must! I tried making a rose using normal sugar paste and the petals cracked and frayed around the edges after thinning. The flower paste can be rolled quite thin, and will still stand up to additional thinning with your sugarpaste tools. I plan on making a cake for these roses tomorrow, so more pics to follow!


0 comments